 Skip to main content


Written by Jess Hobbs
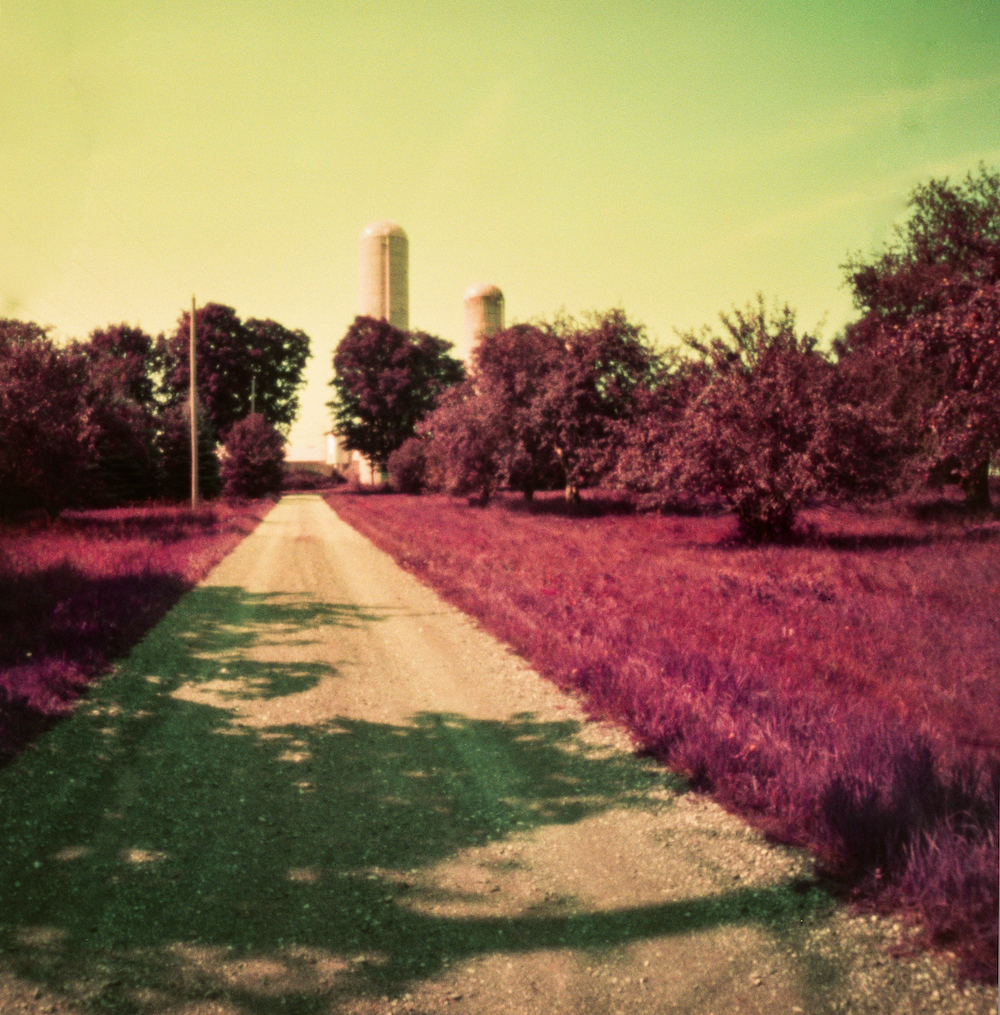
All photos in the article were shot by Jess Hobbs with the Scura 6×6 pinhole camera
In an artistic rut? Feeling overwhelmed? Then grab a pinhole camera and get those creative juices flowing!
Shooting with a pinhole camera allows you to focus on the experience, placing emphasis on the process itself rather than the end result. Young or old, from beginner to seasoned professional, pinhole photography is a fun and easy way to escape the ordinary and focus on composition, get experimental, and practice patience.
So, as you may have already guessed, today we will be talking all about pinhole photography! By the end of this article, you will hopefully be inspired to get out there and create some pinhole magic of your own with our 5 tips and tricks, showcased through the “lens” of our own 3D printed Scura pinhole camera. But first, let’s dive a little deeper into pinhole photography itself. What is it, and where does your journey start?
Let’s get right into it!
The origins of pinhole photography
The notion of pinhole photography has deep historical roots. Through ancient Chinese texts the world was introduced to the concept of the camera obscura effect, defined as a darkened room with a small hole at one end through which light is projected to the opposite wall, back when they were used as educational and scientific tools to study the sun and eclipses.
The first known description of a pinhole camera used for photographic purposes was written about by Scottish inventor David Brewster in his 1856 book “The Stereoscope,” and was described as “a camera without lenses, and with only a pin-hole.” A few decades later pinhole photography rose in popularity amongst artists from the Pictorialist movement as a way to create soft, dreamy images that were heavily inspired by the paintings of the Impressionists. However, following the trend into New Realism in the 1930s, the desire to make images with pinhole cameras had all but disappeared, with the exception of using them for educational purposes.
Clearly it wasn’t all doom and gloom though, and by the 1960s artists were once again using pinhole cameras for creative expression. Cameras were being mass produced, photographers were embracing the simplistic and intuitive nature that these cameras offered, and exhibitions surrounding the medium opened up around the world. Today we even have an annual celebration every April known as World Pinhole Photography Day; it began in 2001, and is now an event that is eagerly anticipated by many photographers, including yours truly!
So, on that note…

Which pinhole camera is the one for you?
I’ve always heard from people with tattoos that “you can’t have just one,” it’s such an addictive process that once you get your first it’s only a matter of time before you find yourself sporting a full sleeve, or even more! Funnily enough, I really only truly understood that statement once I started picking up cameras, especially pinhole cameras.
I am admittedly relatively new to pinhole photography, only having bought my first camera a year ago. It had always interested me, but I was reluctant to jump in because I just didn’t know where to start.
So, how do you choose one when there are so many different brands and beautiful options available? Luckily, being lensless, pinhole cameras are relatively inexpensive so just know that your first pinhole camera, whatever it may be, is only a starting point. And what a better place to start your journey than to explore the two very unique and lightweight 3D printed Scura models we offer: the 35mm panoramic, and the medium format 6×6. You’ll see, it won’t be long before—like me—you’ll have a collection of your own!
The 35mm Scura
Truly unique, the 35mm Scura produces an impressive 25x60mm panoramic image (almost as wide as the coveted Hasselblad X-Pan!). Small and stylish, and weighing in at only 200g, the 35mm Scura is a perfect companion for those who constantly find themselves “on the go”. This would be the camera I would choose if I had a busy day in the city covering multiple locations, or if I were planning a multi-day bike-packing trip where space/weight are of utmost importance.


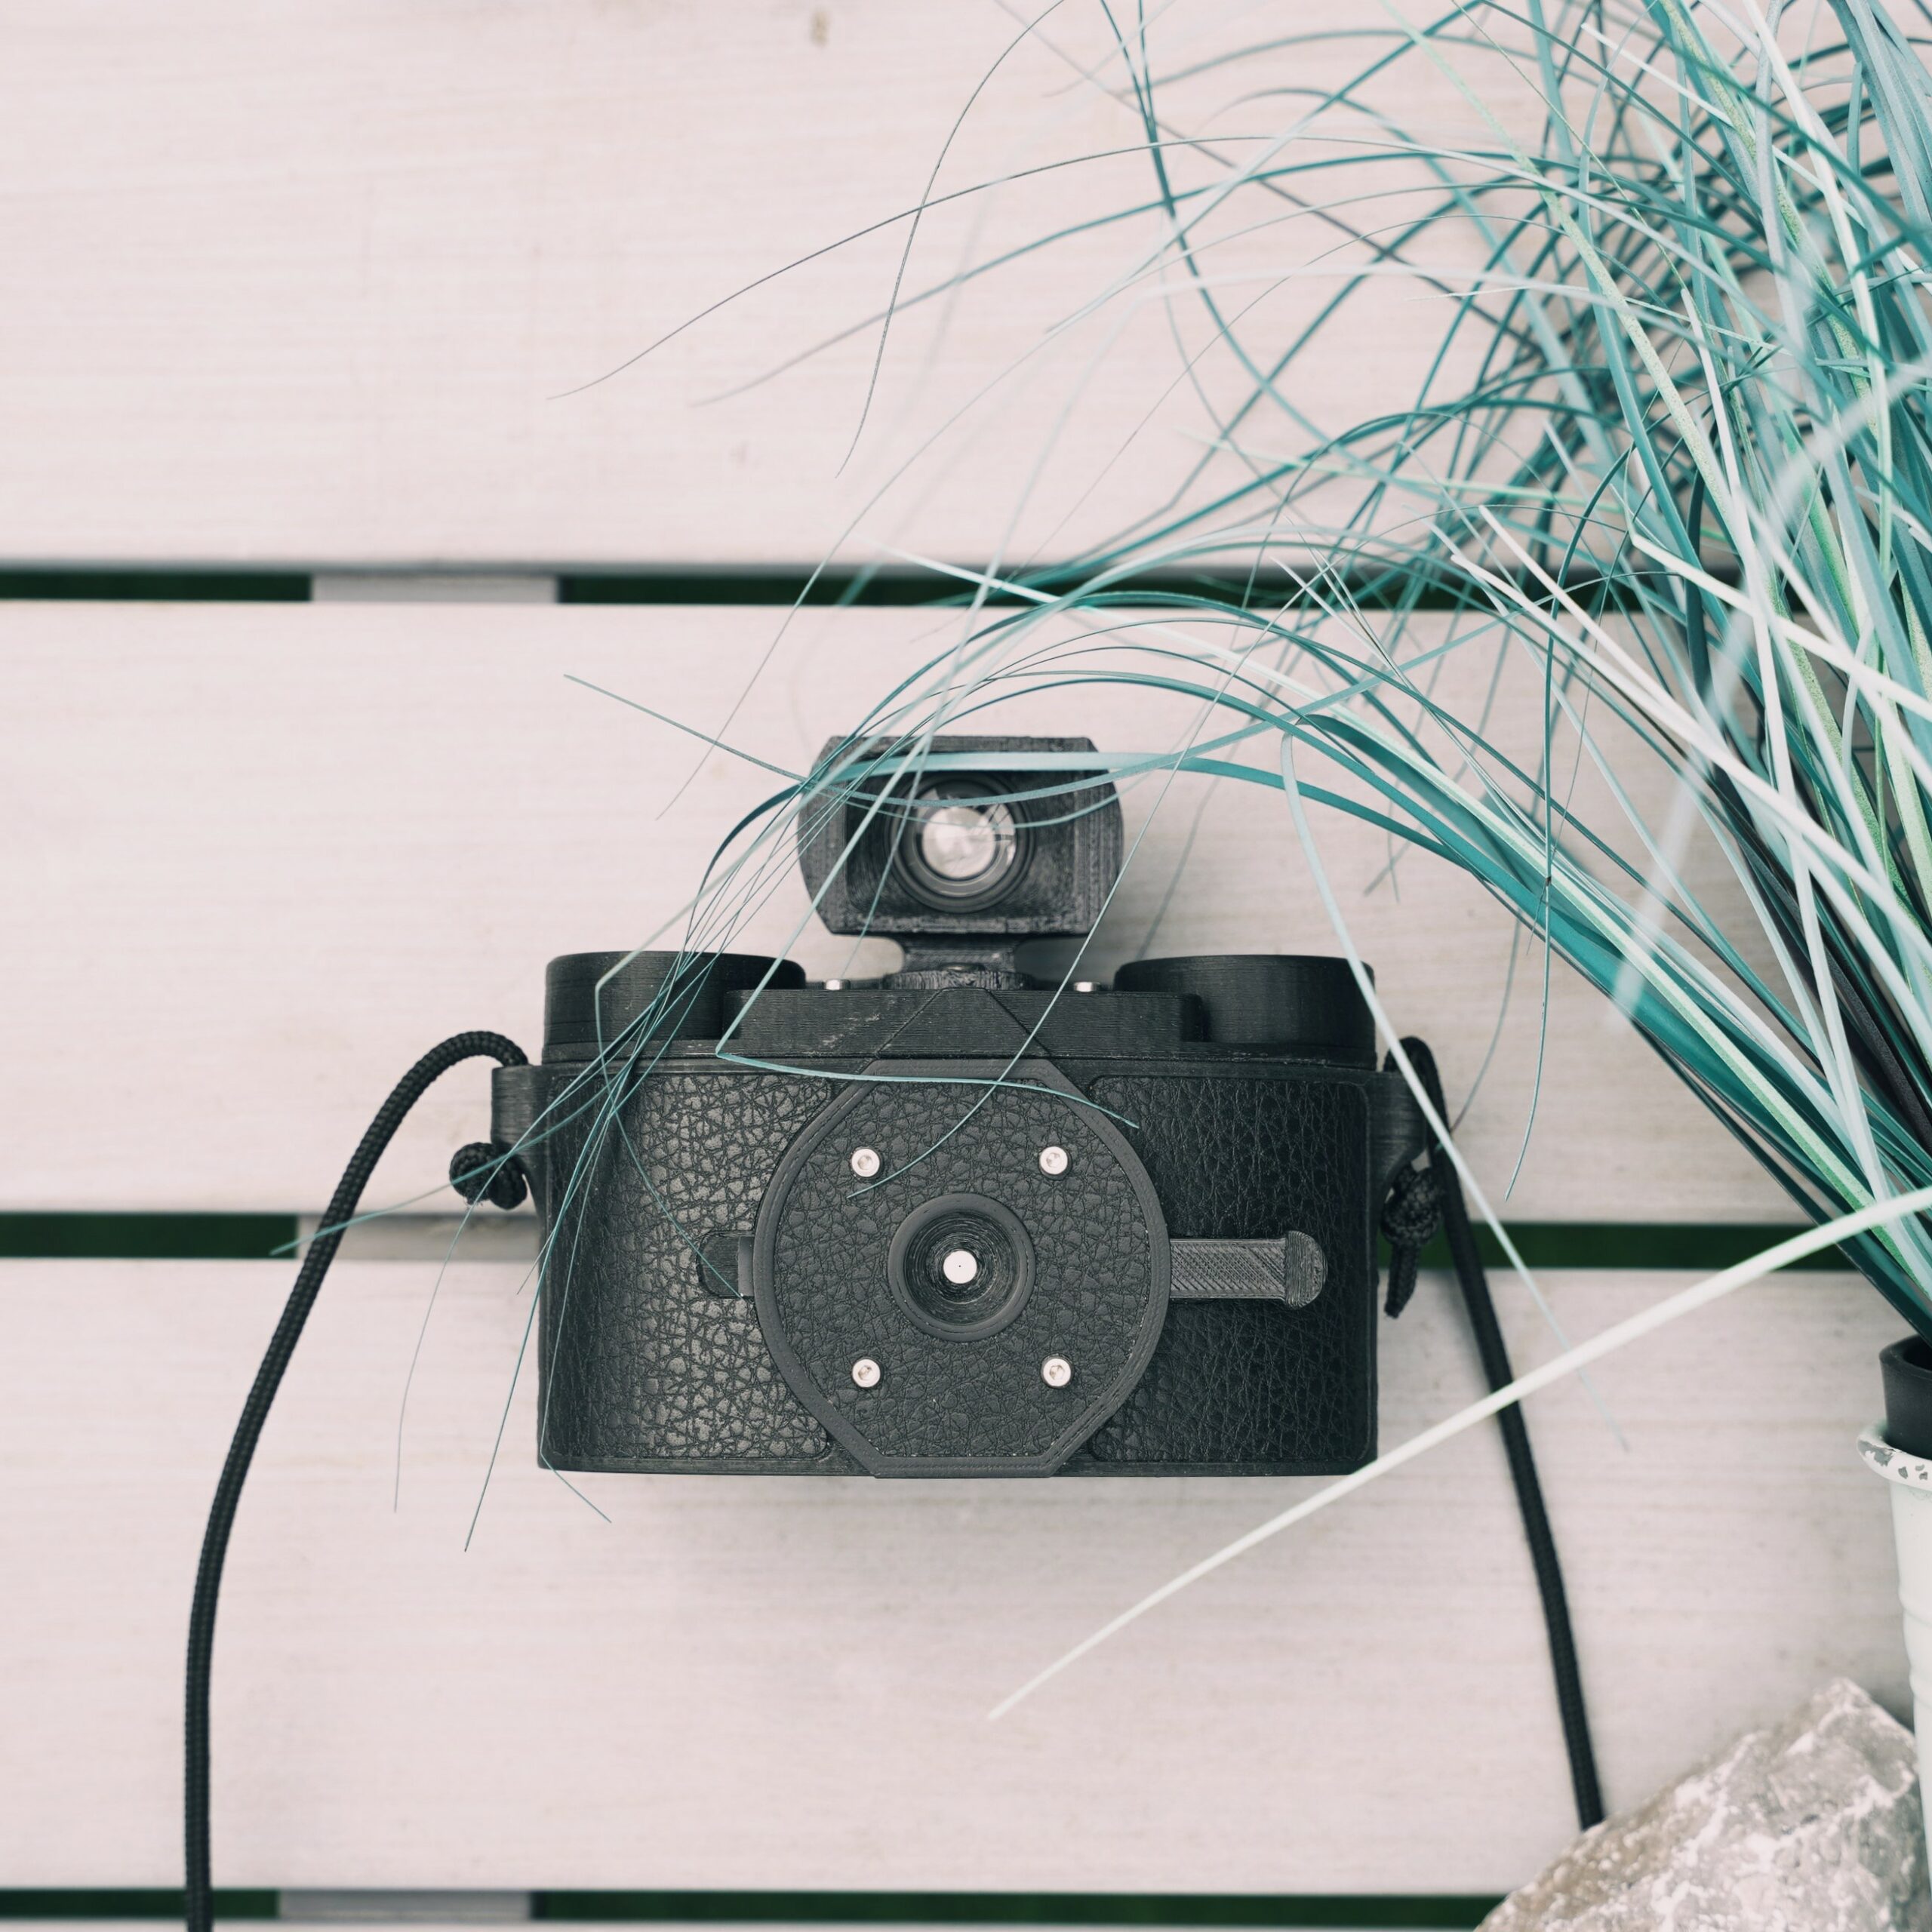
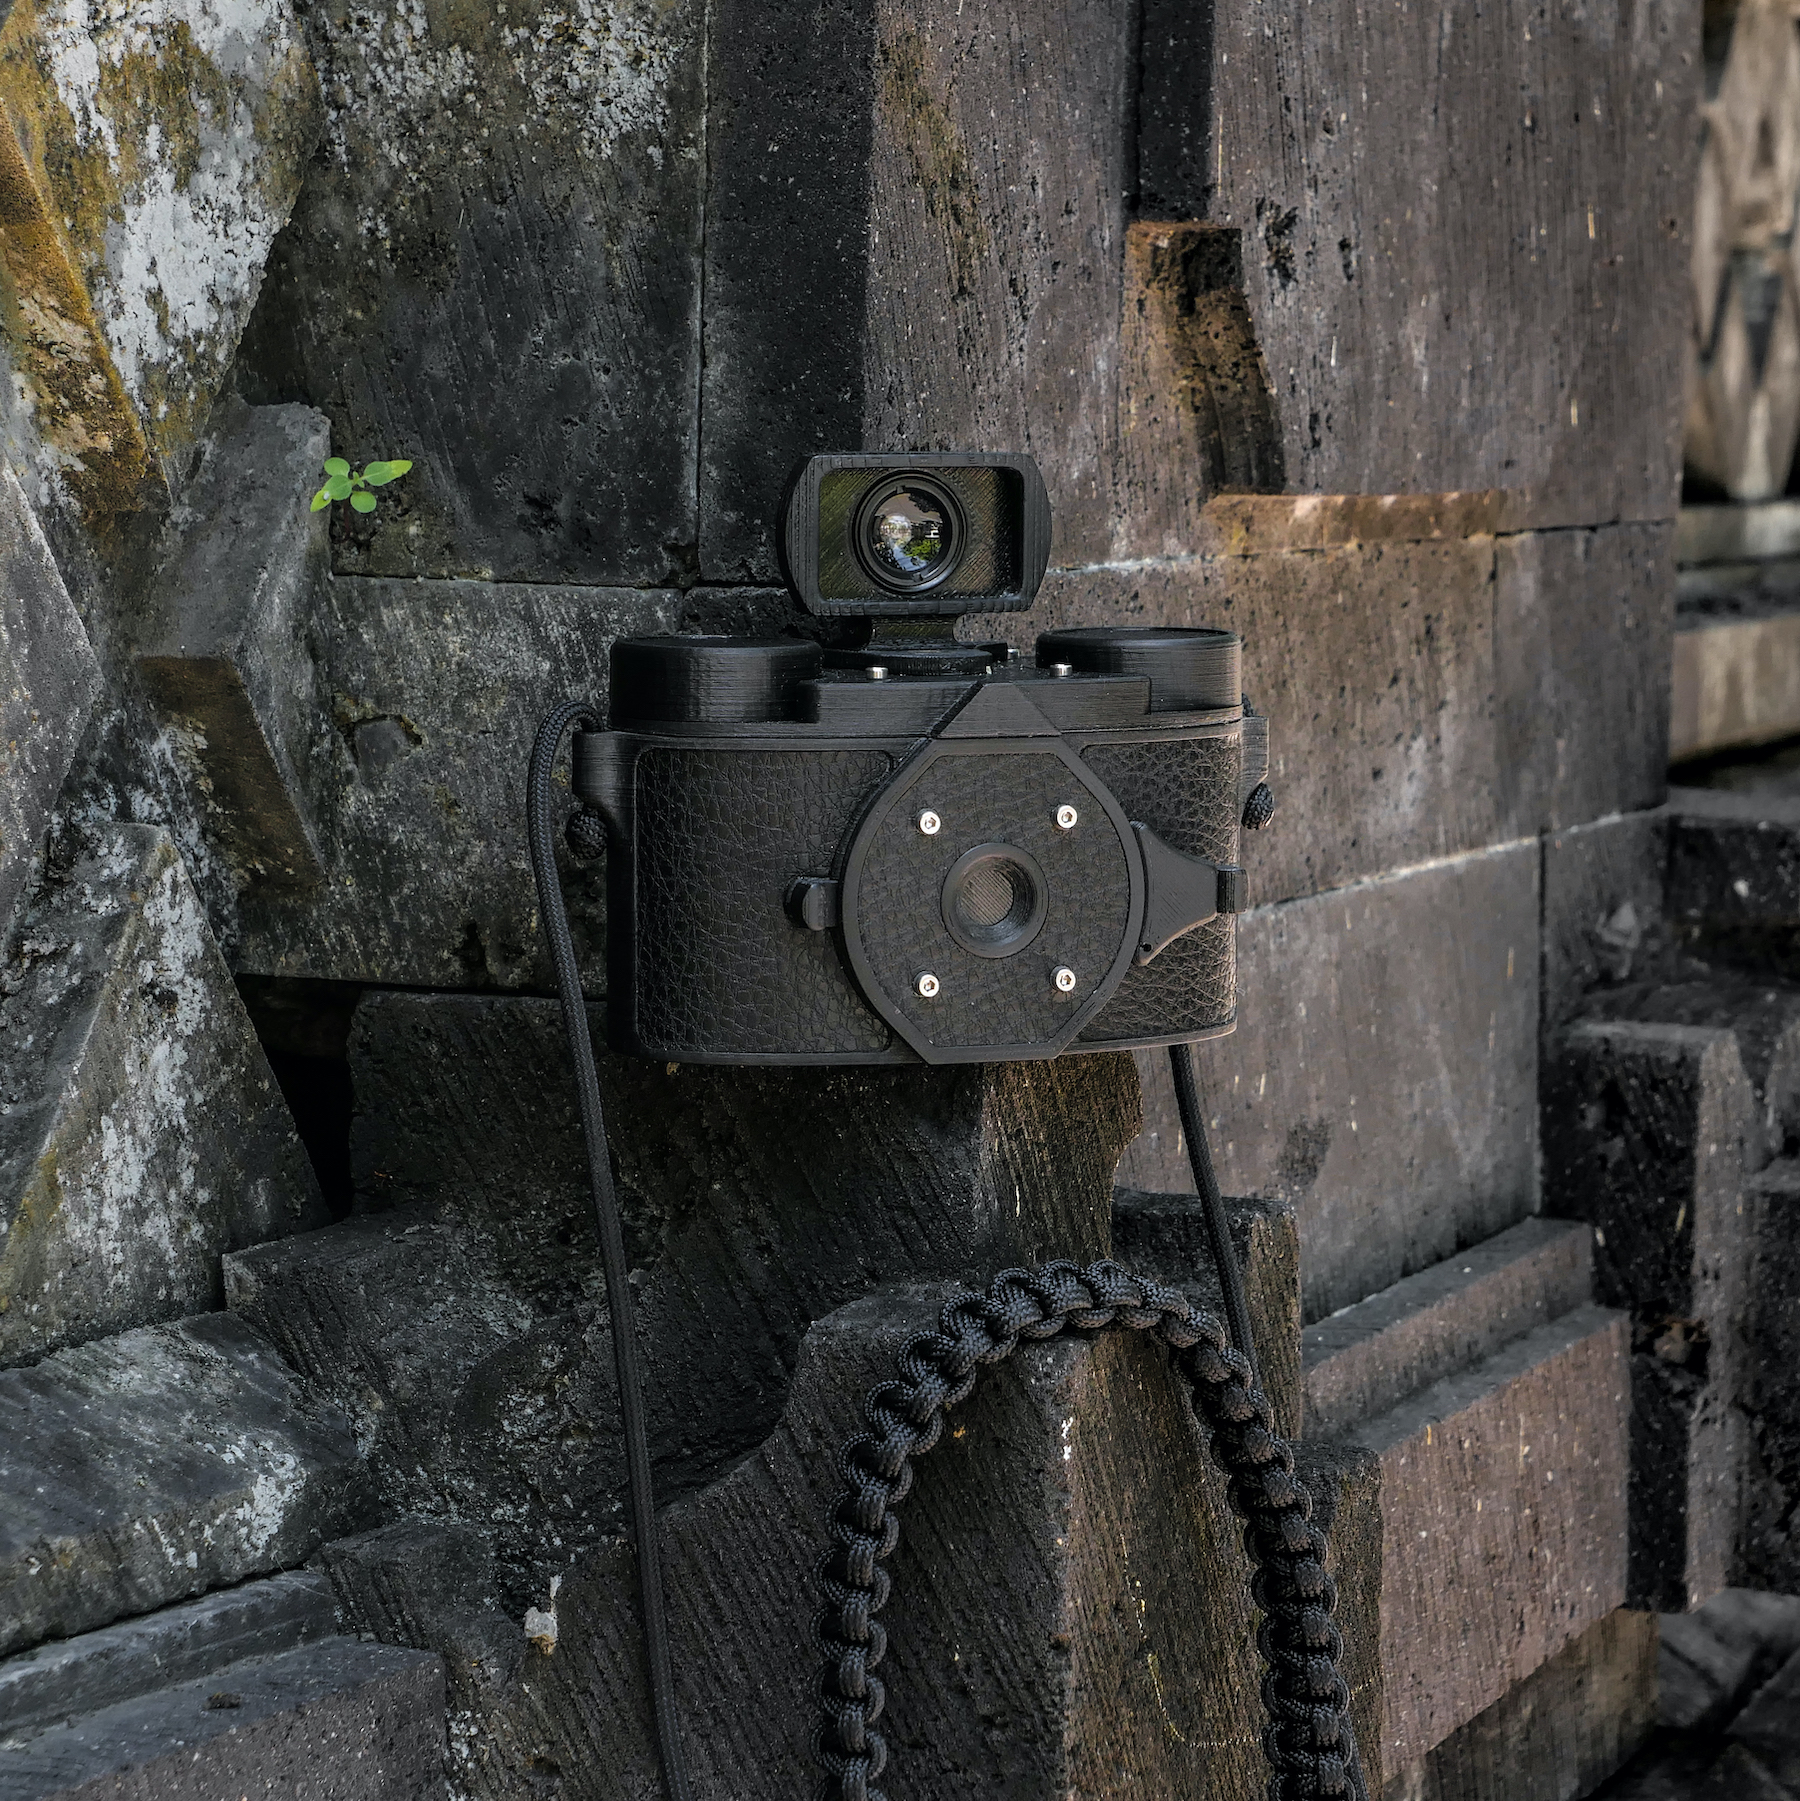
The 6×6 Scura
A timeless classic. For me, you simply can’t go wrong when you pair the dreamy qualities of pinhole photography with a square frame. Capitalizing on the larger negative of 120 film, the 6×6 Scura walks the line between fine grain and soft focus. Whether I’m collecting images for my Instagram feed, or exploring wide open spaces in search of an album cover for a band, I’ll always go 6×6; and at only 270g the Scura 6×6 makes a great addition to my camera bag!


Both of these cameras have a curved film plane, meaning the images have no distortion in the center of the frame with no vignetting, but still provides the delightfully funky fish-eye effect towards the edges, similar to an ultra-wide focal length. Either model is well-made and fun and easy to use, so all you really have to figure out is which format would you prefer to capture beautiful pinhole images on, and remember: when in doubt, get them all!
Now that you’ve chosen your Scura, let’s talk about the elephant in the room: the dreaded reciprocity failure.
Reciprocity failure – A complicated name for a simple concept
Pinhole photography is, at its base, the simplest form of photography. But it’s funny how the more things that get stripped away in the name of simplicity, the more complicated it all seems to get. Ever shoot a Holga? Then you know exactly what I am saying!
Honestly, I could write a textbook sized rant about how during long exposures, light hits the film unevenly which results in a drop in density, and means we have to add extra time in order to have properly exposed images, or I could simply say this: it’s 2021 people, there’s an app for that.
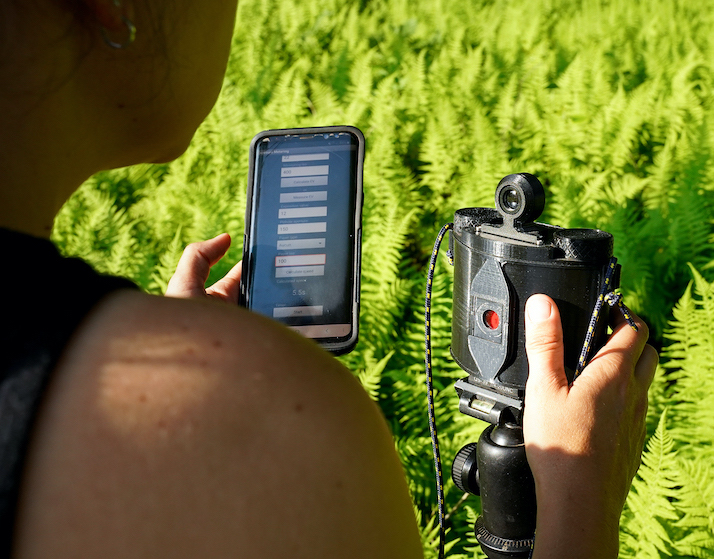
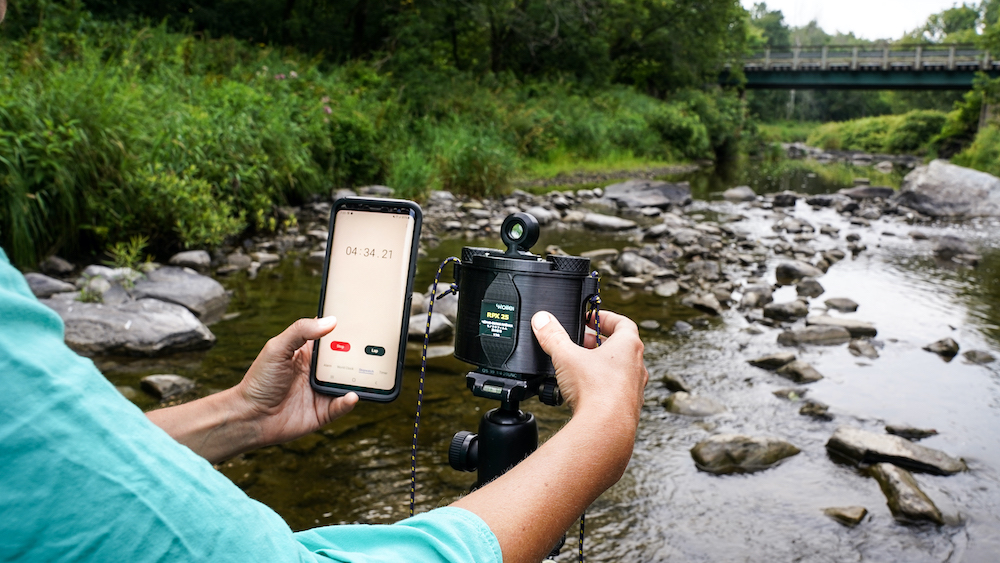
Starting with the Goodfinder app exclusively available on iPhone, it was created to act as a viewfinder and lightmeter specifically for the Scura pinhole cameras, as well as our medium format Zone camera. Although this app doesn’t have a reciprocity calculator built-in (yet), this option is currently in development with the hopes of being able to offer it as an upgrade soon.
Until then, I’ve also tested out my fair share of dedicated pinhole apps, and after a few duds, I’ve narrowed it down to the 2 best: Pinhole Assist by Henry Thomas on iOS, and Pinhole Calculator by Mickaël Adam on Android.
For IOS users:
By far, Pinhole Assist is the most comprehensive pinhole app on the market today; it has a built-in lightmeter, a wide-ranging list of films with the reciprocity failure automatically calculated for each, and an equally long list of compatible cameras so that you don’t have to memorize the aperture of your camera (you’d be surprised, but that’s an easy fact to forget).
For Android users:
On the other hand, Pinhole Calculator is no slouch, it just doesn’t quite have the same features. The film list is much more limited, and you need to use an external lightmeter. You can store information on your pinhole camera as well, but the app itself doesn’t have a list of compatible cameras. That said, this is still the best app available on Android, and it is super easy to use.
For the true analog experience
For those who are a little more experimental and prefer the hands-on approach, I’ll leave you with a piece of advice I was given by a fellow photographer: when in doubt, just double your time. You can always bracket your shots as well, and keep notes of what worked and what didn’t. In time, you will develop your own collection of field notes on different films, and determining the proper exposure time will become second nature.
For the most part, a quick Google search will also give you reciprocity charts depending on which film you are using… I’ve even saved a few favourites as screenshots in my phone to refer to if I have any hesitations.
All right, now let’s get to the really fun stuff!
Tips and tricks: Getting the most out of your Scura
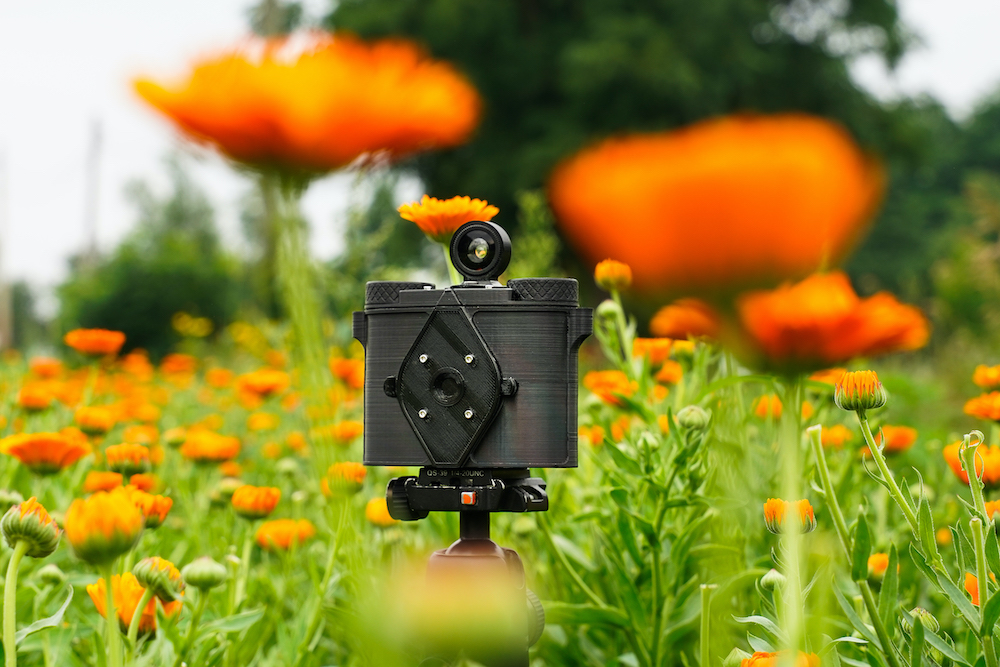
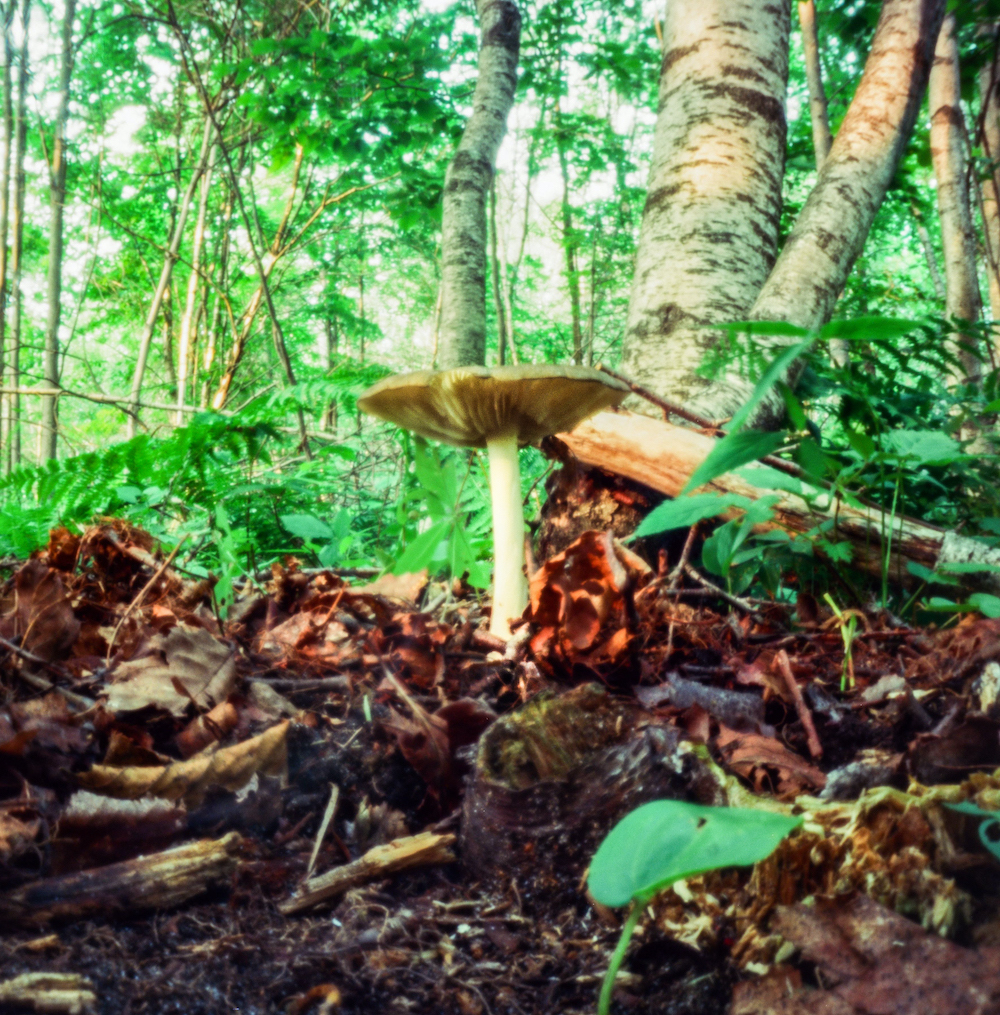
Pinhole photography is a really fun experience, especially once you become more comfortable with the process. However, it does take a little time and patience to get things just right, so hopefully these 5 tips and tricks will give you a head start. While these techniques can be used with any pinhole camera, the shots featured here were all taken on our Scura 6×6 model to showcase just how good the image quality is with our tiny and lightweight cameras.
1.) Get Close
The famous Hungarian photojournalist Robert Capa said it best: “If your pictures aren’t good enough, you aren’t close enough.” Mind you, I’m pretty sure he meant it in more of a documentary photography sense, but I think the sentiment holds true in regards to pinhole photography as well.
How many times have you tried to get in close for a shot with an SLR or rangefinder, only to find that your minimum focus distance is a meter away? One of the best features of a pinhole camera is that the tiny aperture gives an almost infinite depth of field, meaning you can get in really close and your subject will be in (soft) focus. By getting in close you can also make objects seem larger-than-life as they loom against the background, which can be a neat effect, especially if you are able to angle your camera upwards a bit.


2.) Get Low
Use the ground as a way to get a new perspective. Many seasoned pinhole photographers believe that the ground is the camera’s natural place. Leaving the tripod at home will not only lighten your load, but also allow you to see things in a way you normally wouldn’t.
Place the camera in your garden, on a driveway, in the woods, or even on a floor in your house to capture images you normally wouldn’t using a more traditional camera. And don’t be afraid to think outside the box; use rock walls, tabletops, or any other solid surface you can find, the world is literally at your disposal. Maybe just make sure that the camera can’t get run over by cars during a long exposure… I’ve personally had a couple close calls, so I’m a bit more cautious these days!


3.) Take It Slow
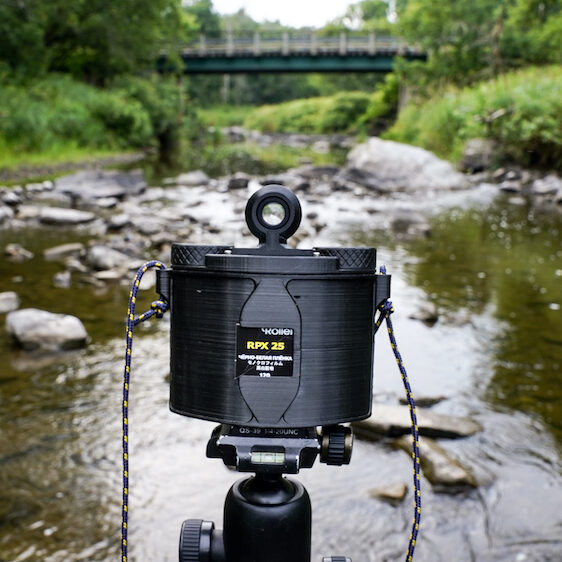
As I mentioned earlier, pinhole is the simplest form of photography, but when you’re new to the process, it can seem like you have a lot going on at once, and quickly feel overwhelmed. Choosing low ISO films can help you maintain your composure, as camera shake is less apparent during longer exposure times. The Scura’s “shutter” is manipulated in a side-to-side manner, kept in place by way of magnets, so an exposure time of 30 seconds is easier to handle than 1 second, at least until you get the hang of the movements.
Besides which, using a low ISO film is a fantastic way to take advantage of the long exposure times to capture movement in the world around you; in doing so, you can make rushing water look so smooth, tame crazy winds, or make traffic appear peaceful and almost ghost-like. It might seem counter-intuitive, but the Scura could even be used on a busy city street… just stand back and slow down time as shoppers and office workers ebb and flow around you.
A little reminder though that sometimes slow can also be too slow. I figured that one out the hard way when I decided to load up with a roll of Rollei RPX 25 on a mostly overcast day. While it’s a beautiful film with hardly any grain, its reciprocity factor is absolutely terrible and resulted in exposure times of nearly an hour. Lesson learned, or maybe I still need to work on my patience!


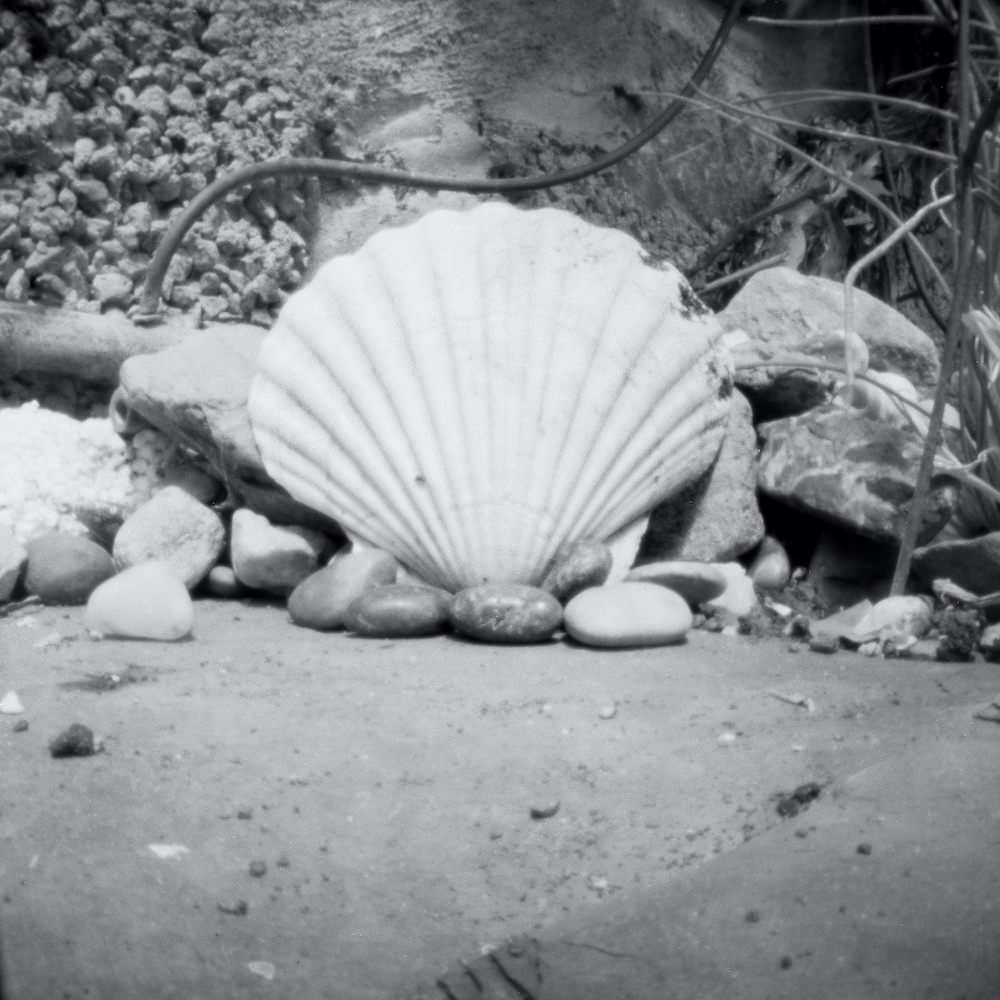
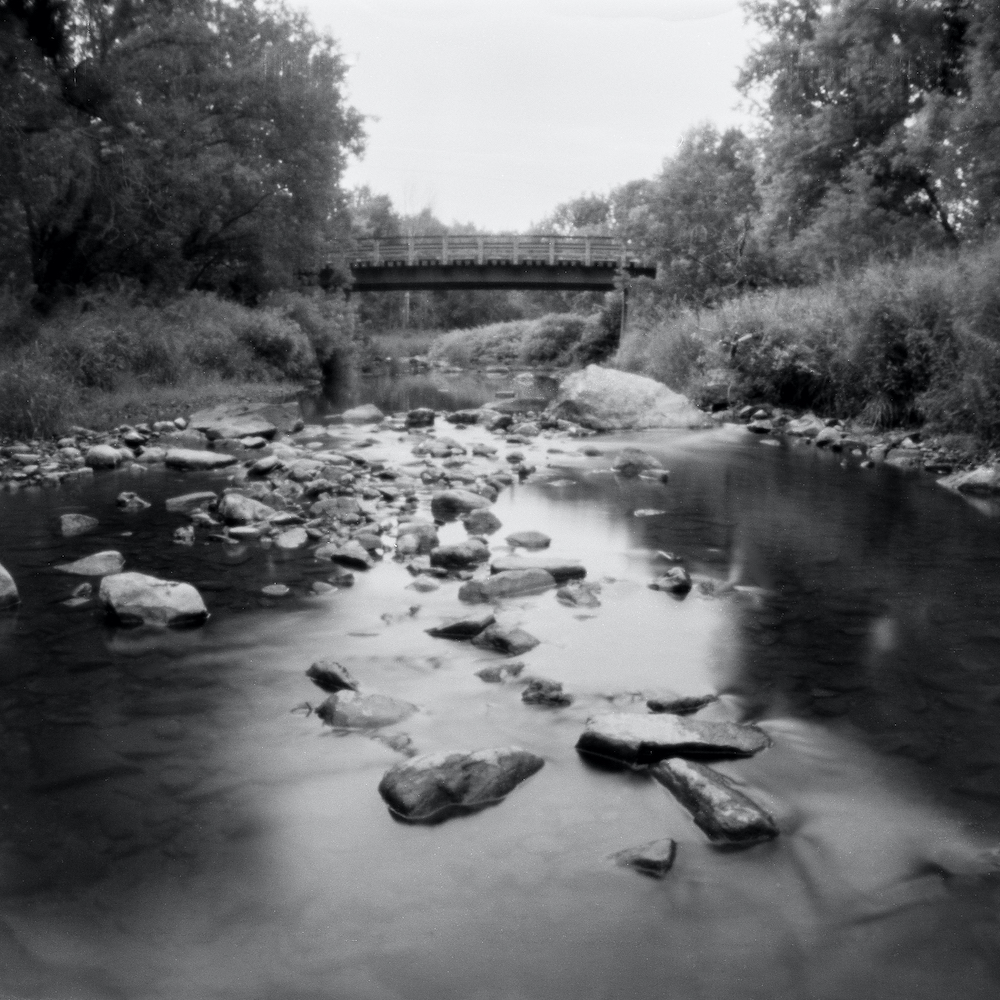
4.) Anchor Your Shot
Just as sailors use anchors to secure their boats in choppy waters and passing storms, photographers also benefit from this example to calm down a chaotic scene by locating stationary subjects. In the previous tip we mentioned using long exposures to smooth flowing water; make sure there are rocks or a bridge in your shot, items that won’t budge but will highlight the water around or under them. Found yourself in a hay field during a windstorm? See if there is a barn or farm equipment nearby and capture the grasses waving in the wind around your motionless subject.
This technique is often used by landscape photographers and, when done well, is very effective in anchoring the viewer’s eye within your frame, rather than drifting aimlessly from edge to edge… unless that’s what you’re going for!


5.) Alter Reality
Did you know that if you cross-process Ilford XP2 in E6 chemicals it creates blue cyanotype-like images? Got any old rolls of severely expired film kicking around in your mom’s old camera bag? Ever hear of Lomography?
My favourite characteristic of pinhole photography is that naturally dreamy and ethereal quality it has, perfect for letting you alter the ordinary. So in this tip I say roll with it… let’s get weird!
Capture soft landscapes, walk around in your scene to give off a ghostly effect, explore the limits of your imagination to create your own world. You can also use fun films or processes to even further push boundaries; films like LomoChrome Purple or Metropolis completely change the colors in a given scene, dive in to cross-processing or “souping” your film to get unexpected effects, and don’t ignore the possibilities of shooting expired film.
Anything you can dream up is a photographic possibility. Embrace the extraordinary!


Bonus tip:
Disregard all rules. Get off the couch, grab your Scura, and experiment, experiment, experiment. Every photographer has their own way of working, no one way is right or wrong, you just have to find the process that is best for you. Let loose, forget about traditional photography as you know it, but most importantly, have fun!
Pinhole photography is a really exciting and easy process, there’s nothing like stripping away the bells and whistles to let yourself focus on the pleasure of creating an image with a simple device, rather than only worrying about the end result. Personally, I find pinhole photography to be a nice compliment to my more traditional work; I can let my hair down and be free with a camera, or use it to get myself out of a creative funk, so I highly encourage the medium for any and everyone.
Hopefully everything we have talked about today will help set you up for success, and please feel free to share your own images, thoughts, and experiences with us!
Until next time, Happy Shooting!


I once used pinholes to be ajuster to digital camera with good results – is your camera digital or film ? – i still use films sometimes- thank you.
Dear Jean-Pierre,
All our cameras are film cameras 🙂
Bonjour et merci pour la précision. J’utilise encore des pellicules 35mm et 6×6 à l’occasion. Quels sont les prix pour les caméras Scura 6×6 et Scura 35 mm ? Merci à l’avance. Jean-Pierre M.
Hi – thank you for your informations – As i use both 35mm film or 6×6 film, i would like to know the prices for both Scura 6×6 and Scura 35 mm cameras. Thank you in advance. Jean-Pierre M.
jeanpierremarchand @ like.ca
You can find more info about them here:
https://doragoodman.com/store/35mm-scura-pinhole-camera/
https://doragoodman.com/store/6×6-scura-pinhole-camera/